Tuesday, November 23, 2010

Mom's Dining Set

So, I said I had an exciting project to start on soon.  It is exciting, but it is also large and not really an ease yourself into things way to start.  I am psyched though and ready for the challenge.  I'm really thankful for the opportunity as it seems like a good kickstart to what I hope will be a successful venture in furniture making.

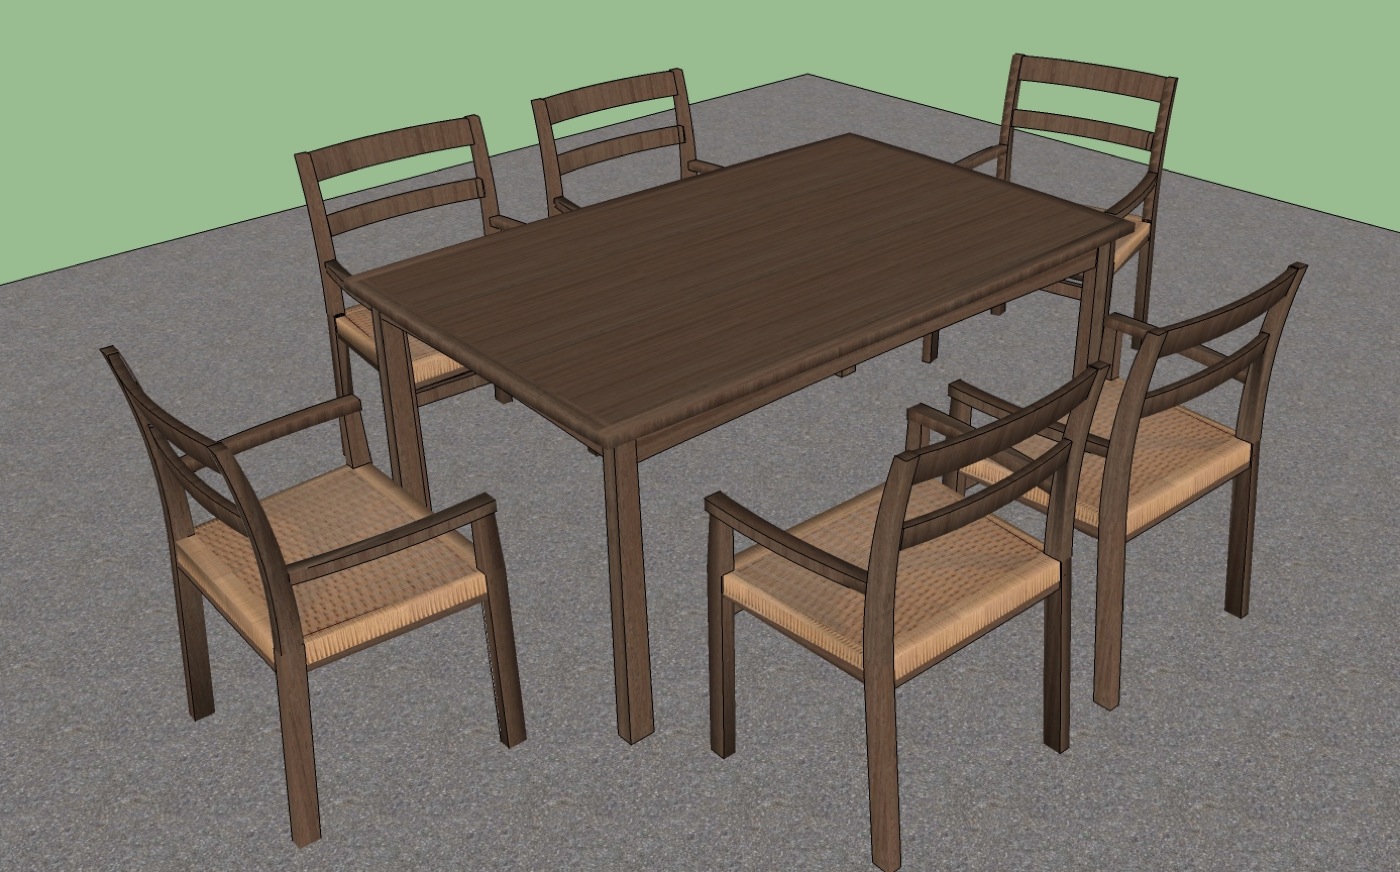
Below you will see some sketch-up renderings of the dining table and chairs that will one day belong to my Mom.  This month was a milestone birthday for her and without giving away her age,  lets just say it was a big enough one that my Dad decided he wanted to commission an extra special gift for her. 

Keep in mind the purpose of these was to give them a general idea of what I was thinking.  The slightly off proportions and shapes leave them looking quite blah but you'll get the idea.


Side view of arm chair.  The stretcher will not have that weird angle...thanks for that sketch-up...


Seats will be woven and yes, I realize Ill be weaving for a week.  I'll pop in a few good movies and tada!...I hope.

I like the armless, plus it keeps thing less crowded around the table...we have discussed the possibility of having 6 arm chairs but I will be voting neh.


The table top looks nice with this perfect quarter-sawn walnut graphic.  I'm still debating how to best construct the table-top.  Veneers or solid wood?  Both seem to have their advantages but we'll see.

The legs of both the chairs and the table will taper slightly and be a little heavier on the bottom.
The mock-up of the chair is done and awaiting testing and approval from Mom.  Mylene and Byron have been kind enough to lend their bottoms and opinions in the name of comfort but I will talk more about that in the next post.  I also have a big pile of wood in the downstairs family room that I will share...well, not share but you know.

Saturday, November 13, 2010

Bench Top (Ulmia-ish Pt. 2)

The bench-top involved many "strips" to be glued together in order to make up the big, flat surface that is the goal.  This isn't simply because my lumber wasn't wide enough to get it out of one piece.  With the top being made out of roughly 2" wide pieces, glued together with the growth rings alternating, it is a much more stable piece of wood.  If you simply took a big wide plank and flattened it into a bench top, in time it could cup and you'd find yourself re-flattening it often.  What this meant was much laminating and much blistered and sore hands.  A wiser man would have worn gloves...
I believe this is the thick section being laminated.
This template, together with a plunge router and guide bushing made the dogholes in the front-most strip before it was glued on,
These are them...
One improvement might have been to make sure that the cleat that seated my template was as thick as my routing was deep.  This would have prevented the jagged bits you can see in the bottom right corner.
The big final glue-up of the top.  I had most recenty jointed and thicknessed these parts when they were in thirds of what you see here.  This left a lot less flattening to do at the end.  Not sure what the plane was there for...just hanging out I guess.
The bread-board ends are slotted with and edge guided router.
The end of the bench is made to match and then a plywood spline is inserted to hold them flush to each other.
This joint is left unglued as the bench top must be allowed to come and go with the seasons.  As such, a big bolt holds the two snugly together.  It is not a lag bolt but I didn't take a photo of the mortise in the underside of the bench that houses the nut.  The end is finger jointed to the back of the tool tray.
Both bread-boards done and the tool tray back glued in place.  It is really beginning to look like a bench.  The tool tray bottom is plywood and it is screwed on in case it ever requires replacement.
The tail vise is also finger jointed together but this sucker was a beast.  Those pieces were basically 6x6s.  Some careful cutting on the bandsaw and, chopping by hand and some fine tuning and they eventually went together.  Likely the biggest joint I'll ever do.
This is the tail-vise installed.  I did not unfortunately take any pictures of the process.  I'm sorry because it really was quite interesting.  The hardware was the veritas tail vise from lee valley.  It differed from the one that the guy had in the plans so in the end I had to alter the elbow part of the tail-vise.  As you can see it is now thinner because my screw was shorter than his was.  No need for fancy handles...a piece of dowel rod and hockey tape is far more Canadian and is quite comfortable too. 
The dawgs, also a fun process, also unphotodocumented.  I promise to be better in future.
I put several coats of oil on the top and sides, letting it soak in, mostly to avoid stains from spilled coffee that I know will occur sooner or later.
The front vise hardware was also from lee valley, their "large" veritas one.  Why do those dogs look so long?   I put a special bit of spalting on the front just because. No drawer because it always annoyed me that it interfered with the dogs and vise-versa.  I can have a drawer elsewhere. 
Done and done, at home with his friends the tool and plane racks and sharpening station as well as a few homages to IP and reminders of how I want to work.
Assembly table out of 2x4s and MDF.  Holds all of the F-clamps, bar clamps and glue-up supplies.  Also rolls over to act as an outfeed table on the table-saw.
Sharpening station.  I bought the motor at a garage sale and combined it with the right sized pulleys so that it goes more slowly.  It's faster still than a hand-grinder but I like having two hands free to guide the blades over the stone.  Not running to the machine room to grind is also nice, I tend to do it more often because it's right there.
So that's it, the bench is done and the shop is really 99% where I want it to be.  The next step is doing some work!!  I have an exciting project in the initial stages and I will share more about that in the next entry as this one is already a monster...

Happy woodworking!!!

Thursday, November 4, 2010

Ulmia-ish Part 1


This is going to be a whirlwind post about how I made my bench.  It has been an ongoing project over the last couple months but has mostly come together in the three weeks.  I found plans on the internet that were based on an Ulmia bench like the ones we had at school.  Front and tail vises, tool tray and solid trestle base.

"Here we go..." - St. D.S.
The wood I chose for my bench was "Natural" Maple.  It was the cheapest hardwood available because apparently no one likes the heart-wood color in their maple.  OK?! Bring it on...
The mortises for the base were challenging because of the size.  I needed 2.5" x1" mortises that went 2.5" deep.
I tried this jig (left over from Rya's crib) using a 1/2" bit, figuring I'd rotate it 180 and have a nice centered mortise.  Problem: it left the ends needing to be cleaned out by hand and I was ending up with varying mortises, thus requiring more custom tenon fitting than I wanted to do.
In the end I made a template and used a bushing to do them.  It worked really nicely and my first attempt with the jig turned out to just be waste removal! :)  And no, the legs are not all nice straight rift....
Some nice shaping detail on the front ends. Tenons were cut on the tablesaw and bandsaw and then fit using the shaper before being fine-tuned by hand.  It went quick and made for an incredibly strong joint.
The front and back stretchers.  You can see the stub tenon and the holes to accommodate the 6" bolts, nuts and washers that secure them to the leg trestles.
A little edge softening with yes, a roundover bit and the base is done!  It's rock solid and what more could I ask?
 On second thought, I'm going to break this into 2 posts.  It'll be too long to get through if I do it all in one.  The rest is more interesting so check back!